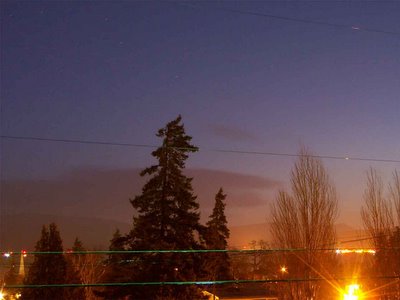
 This is a quick demo showing how easy it can be to remove wires and other things from
an image. I could have also changed the brightness and many other factors. If you
get Photoshop or Photoshop Elements--I strongly recommend that you buy a book as well
as spend a great deal of time just playing around with things. Be sure in JPEG, RAW or
TIFF (especially in JPEG) that you make your original straight from the camera image
loaded onto your computer is immediately BACKED UP onto a CD creating a "digital
negative" that you can always return to is you make mistakes that cause your on-computer
file to become corrupted or edited badly. Backups are the most important computer
skill to learn. Just like saving your negatives. If you use high or fine JPEG and use your
backups correctly you don't have to worry about huge RAW or TIFF files for nearly
everything. JEPG is good enough as long as you know how to use it so that it does
not degrade--the "digital negative" is a "perfect" copy of the original incase you do
degrade it by accident. JPEG degradation usually happens with editing programs.
Even Photoshop has a default JPEG setting of "medium". You have to turn it up to
10 or 12--the highest setting to make certain your file looses little or no data. Each
time the file is accessed and re-saved especially in new or different image editors your
likely to lose aspects of the file. Keeping "digital negatives" is insurance that you will
never lose all. Personally--as CD-Rs and DVD-Rs are venerable to everything from
sunlight to time itself, not to mention dust or scratches in the wrong place--usually
always even in long-backups that last for 10 disks--make a seconded set of disks as
backup. Incase some very important file comes up corrupted. That seconded backup
could save your file as you cannot ever keep all your pictures on your computer.
You may have 40 to 500 gigs--no matter how large your HDD is you will sooner or
later have to start facing the reality of space and the fact that you cannot keep all
your pictures on your computer. So use a method that will last in backups and make
sure that you don't forget your work by making contact sheets so you can see every
immage in your 50,000 or 100,000s of thousands of pictures or more that will not
fit on any HDD.
 Computerized "contact sheets" can be done many ways. The most easy is to setup the
files in windows to show thumbnails across the screen. Or--use a photo-organizer that
does it (can be better as this may show dates and other file information). Then use the "Prt Sc"
button (also called the Sys Rq). This will save (in Windows XP) a copy of the desktop
and everything on it to the clipboard. Then open up Paint (in Accessories folder) to
quickly name a JPEG file as each page of thumbnails is saved. Be sure not to save
it in default BMP because a bitmap file will be way to large. Save as JPEG which should
be less then 260k each. That way you can save a small copy of every picture you
ever took. With it if you have the dates displayed on the pictures or near them in a
photo-organizer then it is very easy to look up the date and thus find the disk that
the file is on (or at least narrow down your search to less then a few disks). Weather
you are using CD-R or DVD-R--if you shoot allot of pictures you will soon have a
sizeable number of disks. Keep them in a dry safe place where you keep your film
negatives. Of course I saved this file as a backup and then delete most of the files
I don't like very much--making room for the next ones. But keeping a small thumbnail
view. In the shot below I used Photoshop as I say to remove the power-lines. It takes
some time--a hint here--USE STRAIGHT LINES and keep the brush size right for each
line. Then cover it up in a straight line to avoid serious problems. If done right--further
editing could produce a seamless image you would never guess that any utility lines
exist in it. The "band aid" healing tool is all you need and no duplicate layer is needed.
Click on pictures for full view.
No comments:
Post a Comment